AC Refrigerant Leak: How to Spot It, What It Costs, and Why It’s Urgent
Repairing an AC refrigerant leak in the Savannah area costs between $200 and $1,500 depending on the leak location and refrigerant type, with most residential repairs falling in the $400 to $900 range once you factor in the leak repair itself plus the refrigerant recharge. Leaks in accessible locations like service valve connections cost less to fix, while leaks buried inside the evaporator coil or running through walls can push costs toward the upper end — and sometimes make the repair not worth doing at all.
Refrigerant leaks are not a “top off and forget it” problem, though that is exactly how many homeowners and even some technicians treat them. Adding refrigerant without finding and fixing the leak is the HVAC equivalent of putting air in a tire with a nail in it. You will be paying for another recharge in 6 to 18 months, and every cycle of low refrigerant operation causes cumulative damage to your compressor that eventually turns a $600 leak repair into a $2,500 compressor replacement. Understanding what a refrigerant leak looks like, where they happen, and what the repair actually involves gives you the information you need to handle this correctly the first time.
How to Tell You Have a Refrigerant Leak
Refrigerant leaks produce a set of symptoms that overlap with other AC problems, which is why they are frequently misdiagnosed or caught late. But there are several indicators that, taken together, point strongly toward a leak rather than some other failure.
Your AC blows lukewarm air that gets progressively worse. This is the hallmark sign. Unlike a sudden component failure where the system stops producing cold air all at once, a refrigerant leak causes a gradual decline. The air coming from your vents might feel slightly cool at first — not the crisp cold you are used to — and then trends warmer over days or weeks as the charge drops. If your system was cooling fine last month but has slowly gotten weaker, low refrigerant is the most likely cause.
Ice forms on the refrigerant lines or evaporator coil. This seems counterintuitive — how does losing refrigerant cause ice? The answer is pressure. As refrigerant level drops, the remaining refrigerant expands more than designed, dropping the evaporator coil temperature below freezing. Moisture from the air then freezes on contact with the coil surface. If you see ice on the copper lines running from your indoor unit to the outdoor unit, or if you pull back the access panel on your air handler and see a coil covered in frost, shut the system off and call a technician. Running the system with a frozen coil can damage the compressor.
You hear a hissing or bubbling sound near the indoor or outdoor unit. Larger leaks sometimes produce an audible hiss where refrigerant gas escapes through the breach. Bubbling sounds indicate a leak at a point where the refrigerant is in liquid state. Not all leaks are audible — many are far too small to hear — but when you can hear it, you can be certain the leak is significant and the system is losing charge quickly.
Your energy bills spike without explanation. A system running low on refrigerant cannot reach the thermostat setpoint efficiently, so it runs longer cycles and cycles more frequently. The result is a noticeable jump in electricity consumption. If your July electric bill is 20-30% higher than the same month last year with no changes to thermostat settings, occupancy, or rate structure, a refrigerant leak is worth investigating.
The system short-cycles. When refrigerant drops low enough, the low-pressure safety switch on the compressor trips to prevent damage, shutting the system off. As pressure equalizes after shutdown, the switch resets and the compressor starts again — only to trip the safety again minutes later. This rapid on-off cycling is called short-cycling, and it is one of the later-stage symptoms of a substantial leak.
Where Refrigerant Leaks Happen and Why It Matters
The location of the leak determines both the repair difficulty and cost. Not all leaks are created equal, and some locations are straightforward fixes while others make replacement the smarter financial decision.
Service valve connections and flare fittings are the most common and cheapest leak points. These are the threaded connections where refrigerant lines attach to the outdoor condenser, the indoor coil, or the service ports that technicians use to check pressure. Vibration and thermal expansion over years of operation can loosen these fittings gradually. Tightening or re-flaring a leaking connection typically costs $150 to $300 including the leak search and any refrigerant top-off needed.
Copper refrigerant line sets running between the indoor and outdoor units can develop leaks from physical damage, UV degradation on exposed sections, or corrosion. Lines that run through attics in Savannah-area homes are exposed to extreme temperature swings — 140°F or higher in a July attic — which accelerates joint fatigue over time. Repairing a line set leak depends on accessibility. A leak in an exposed section of line is a $200 to $500 fix. A leak inside a wall or under a slab gets complicated fast, sometimes requiring a line set reroute rather than a direct repair, pushing costs to $800 or more.
Evaporator coil leaks are the most expensive and consequential. The evaporator coil sits inside your air handler and is the component where refrigerant absorbs heat from your indoor air. Coils develop leaks from formicary corrosion — a type of pinhole corrosion caused by the interaction of copper with volatile organic compounds found in household air. Cleaning products, air fresheners, and off-gassing from new building materials all contribute. In Savannah’s humid environment, the coil surface stays damp almost continuously during the cooling season, which accelerates this corrosion process significantly compared to drier climates.
Evaporator coil replacement runs $800 to $2,000 including labor and refrigerant, and it is the leak location most likely to tip the repair-vs-replace math toward system replacement — especially on equipment over 10 years old. Patching an evaporator coil leak is possible but unreliable. The corrosion that caused the first pinhole has almost certainly weakened adjacent areas of the coil, and a second leak within 6 to 12 months is common after a patch repair.
Condenser coil leaks on the outdoor unit are particularly prevalent along the Georgia coast. Homes in Tybee Island, Wilmington Island, and the eastern portions of Savannah experience salt air that attacks the aluminum fins and copper tubing of the condenser coil relentlessly. A condenser coil replacement costs $700 to $1,500, but if the salt air corrosion is advanced enough to cause leaks, it has likely also degraded the coil’s heat transfer efficiency to the point where replacement of the entire outdoor unit may be more cost-effective.
The R-22 Factor Changes Everything
If your system uses R-22 refrigerant, a leak of any size shifts the financial equation dramatically. R-22 production ended in the United States in January 2020, and the remaining supply comes exclusively from reclaimed stockpiles. Current pricing sits between $80 and $150 per pound, and most residential systems hold 6 to 12 pounds of refrigerant total.
A system that has lost half its R-22 charge through a slow leak might need 3 to 5 pounds to recharge — that is $240 to $750 just for the refrigerant, before you add the cost of finding and repairing the leak itself. And because R-22 prices only trend upward as supply continues to shrink, every future recharge will cost more than the last.
For R-22 systems with confirmed refrigerant leaks, the repair-vs-replace conversation is almost always tilted toward replacement. The combined cost of leak repair plus R-22 recharge on a system that is already 14 to 20 years old (since R-22 systems were last manufactured around 2010) rarely pencils out compared to investing that money toward a new system running R-410A or R-454B with a full manufacturer warranty and dramatically lower operating costs.
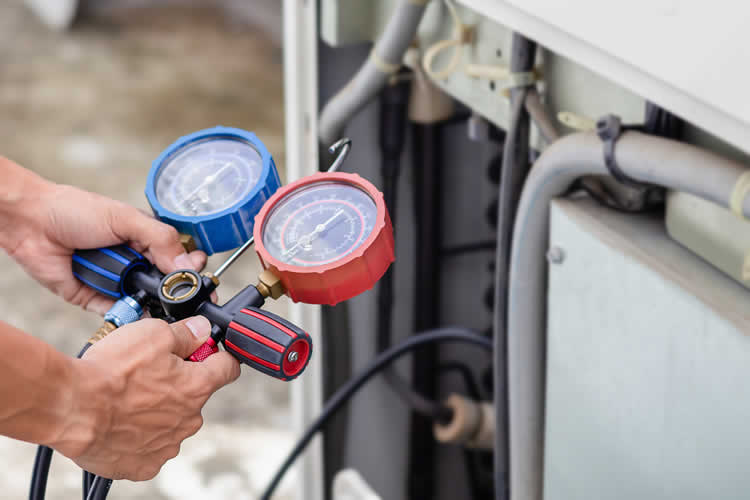
How Technicians Find Leaks
Leak detection is not guesswork, though the methods vary in accuracy and cost. Understanding what your technician should be doing helps you evaluate whether the diagnosis is thorough.
Electronic leak detectors are the most common first step. These handheld devices sense refrigerant gas in the air and alert the technician when concentration levels indicate a nearby leak. Modern electronic detectors are sensitive enough to find leaks as small as 0.1 ounces per year, but they require patience and methodical scanning of every connection, coil surface, and line section. A rushed leak search with an electronic detector misses leaks regularly.
Ultraviolet dye testing involves injecting fluorescent dye into the refrigerant system and running it for a period — sometimes 24 hours or more — then scanning all components with a UV light. The dye glows at the leak point, making even very small leaks visible. This method is excellent for finding slow leaks that electronic detectors struggle with, but it requires a return visit, which adds to the cost.
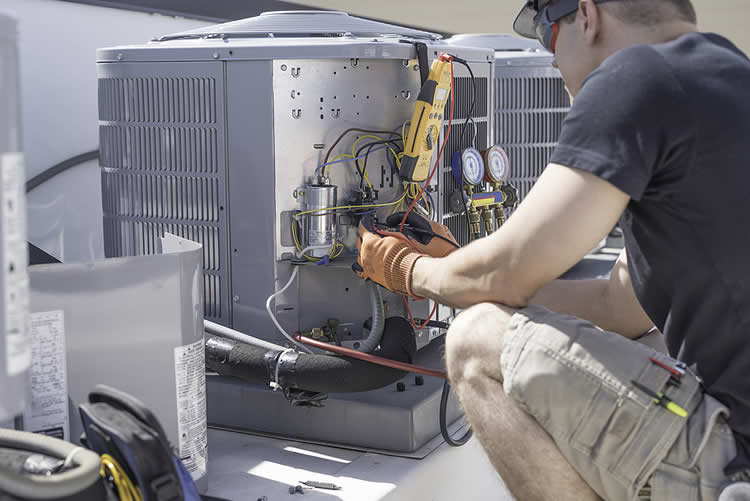
Nitrogen pressure testing is the most thorough method and the one Carriage uses for any leak that is not immediately obvious. The system is evacuated of refrigerant, pressurized with dry nitrogen to a level above normal operating pressure, and then monitored for pressure drop over time. This confirms the presence and approximate size of a leak, and isolating sections of the system individually can narrow the location. It takes longer than electronic detection but eliminates false positives almost entirely.
A thorough leak search typically adds $100 to $300 to the total repair bill. That cost is worth it. A technician who adds refrigerant without searching for the leak — or who does a cursory 10-minute scan and declares the system “probably fine” — is setting you up to pay for another service call in less than a year.
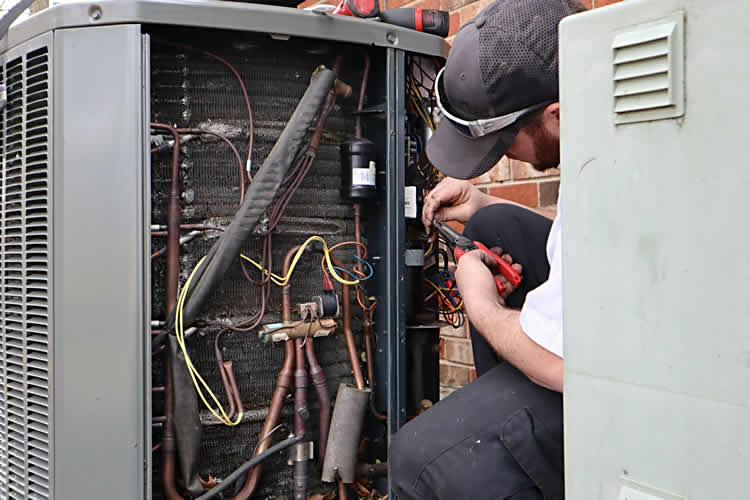
What a Proper Leak Repair Looks Like
Finding the leak is half the job. The repair itself needs to be done correctly or you will be back in the same situation within months.
For connection and line set leaks, the repair involves brazing — using a high-temperature torch to seal the leak point with silver-bearing solder. This is not the same as the soft soldering used in plumbing. HVAC brazing requires flowing nitrogen through the system during the repair to prevent oxidation inside the lines, which would introduce contaminants that damage the compressor. If your technician is brazing without nitrogen flow, the repair is substandard regardless of how well the joint looks externally.
After the repair, the system must be pulled to a deep vacuum using a vacuum pump. This removes any moisture or air that entered the system through the leak or during the repair process. The vacuum should hold for a minimum of 20 to 30 minutes — a proper deep vacuum on a residential system takes 30 to 60 minutes. Only after the vacuum holds stable should the system be recharged with refrigerant, weighed to the exact factory specification listed on the outdoor unit’s data plate.
Skipping the vacuum or undercharging the refrigerant to save time are the two most common shortcuts in leak repair, and both lead to premature compressor failure down the road.
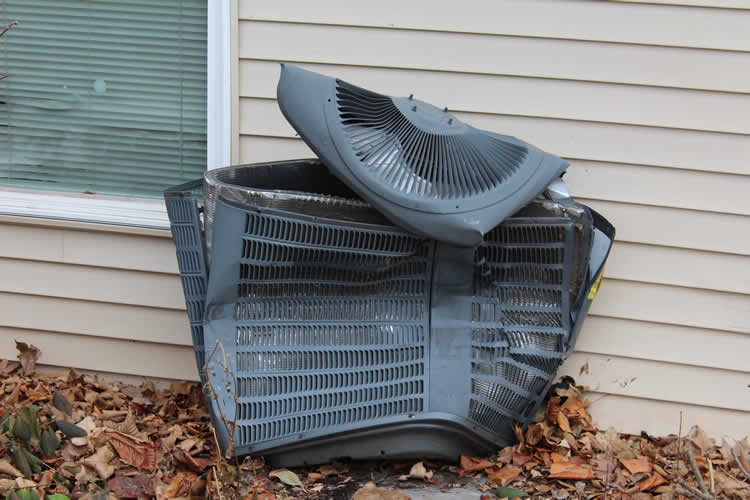
When to Fix the Leak and When to Walk Away
Fix the leak if the system is under 10 years old, uses R-410A or newer refrigerant, the leak is in an accessible location, and the repair estimate including recharge stays under $800. Under these conditions, you are looking at years of additional reliable service from the repair.
Seriously consider replacement if the leak is in the evaporator coil on a system over 10 years old, the system uses R-22, you have had previous refrigerant leaks repaired on the same system, or the total repair cost exceeds $1,200. Multiple leaks on the same system almost always indicate systemic corrosion rather than isolated failure, and patching one leak when others are developing is a losing strategy.
At Carriage Heating & Cooling, we perform nitrogen pressure testing on every suspected leak to give you an accurate diagnosis before quoting any repair. We do not add refrigerant without identifying and repairing the source, and we will tell you plainly when the leak repair does not make financial sense given the age and condition of your equipment. Call us at (912) 306-0375 for leak diagnosis anywhere in Pooler, Savannah, Richmond Hill, or the surrounding area.